If you are a beginner looking to start flying a drone, there are some important steps to take note of which I will cover in this post.
- Learn the rules & regulations of flying a drone and stay out of trouble
- Get familiarized with your drone
- How to use drone controls and aerodynamics
- Pre-flight checklist and considerations
- Takeoffs and landings
- Beginner drone flying techniques
- Drone safety tips
- Basic mistakes and how to fix them
Drones also commonly known as Unmanned Aerial Vehicle (UAV) has been a prominent controversial topic for the last few years and have swiftly been adopted by the public.
Drones have been in existence since 1917 when the first drone was invented, and it was a military drone. It was radio controlled, pilot-less and was based on the RC technology. Today, drones have become the most significant milestone of the 21st century since they are flown both figuratively and literally. Their use today has been diversified right from surveillance to photography, to search and rescue, to delivering packages and list goes on and on.
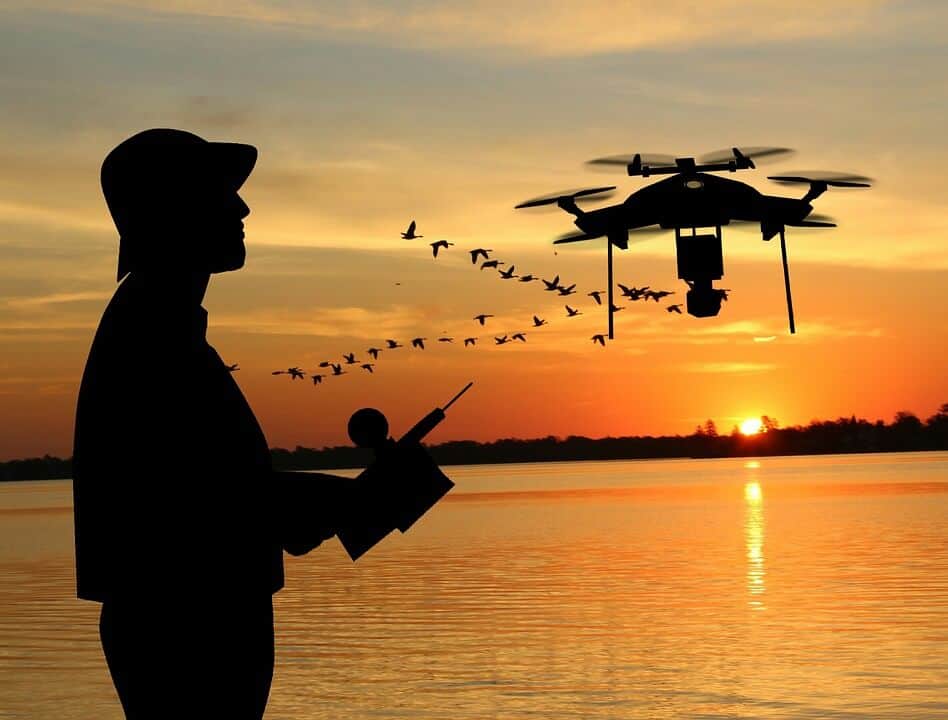
Everyone wants to familiarize themselves on how to use a drone for recreational purposes among other reasons, and if you are one of those people hoping to learn this new hobby, then this article is meant for you.
Below is a guideline that will help you acquire the skills as well mindset needed to learn on how to effectively fly a drone.
Step 1: Learn the Rules & Regulations of Flying a Drone and Stay out of Trouble
Ideally, many critics fail to address this as the very first phase towards learning how to fly a drone. However, this should be the very first phase since the learner needs to know what is fully required of them before they even engage in the learning process.
Learners need to know the rules and regulations that guide the flying of drones so that they can stay out of trouble even during the training process. For starters, before you even start flying your drone, you need to register it with the Federal Aviation Administration (FAA). Even though you are flying your drone in your backyard, it’s a rule that you must register it first, and you can do it at the FAA drone zone website.
For you to complete the registration, you must be at least thirteen years old, and the registration cost is $5. It’s also important to note that the registration is valid for three years after which you are expected to renew your registration again. After registration, you should mark your drone with the registration number for easy identification purposes. You are also required to present your drone to the FAA for inspection.
After registration, you are required to familiarize yourself with the rules of flying your drone before your first flight and the rules include; flying only for recreation purposes or fun and ensuring that you follow the safety guidelines of the model aircraft community-based organization.
Fly up to 400 feet and not beyond that in uncontrolled airspace. Fly your drone within your vicinity. Never fly near an aircraft base. Never fly over or near emergency response efforts. You should also not fly your drone over unpermitted space either publicly or privately. If you intend to fly more advanced drone operations, then you should review the Part 107 Operation Waiver.
It’s also important that you as a drone operator to familiarize yourself with the rules of the sky; for instance, where it is safe to fly and where it’s not, drone safety tips, as well as airspace restrictions. Having done all these then you are good to go, you can freely learn on how to fly a drone since you know what you are up against.
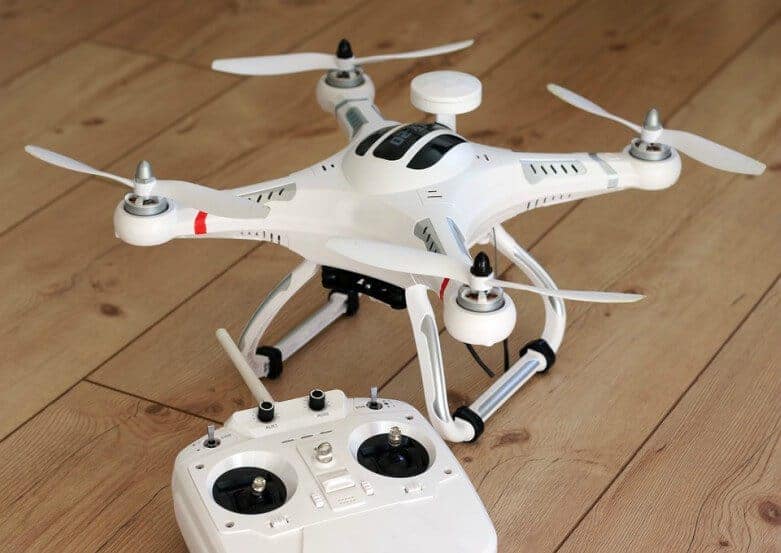
Step 2: Getting Familiarized with Your Drone
This phase is also critical since it’s this stage where you get to familiarize yourself with your drone. You can use the user manual to gain an understanding of your drone as well as its features. The manual will also help you to understand the various controls function and how to use them as well when to use them.
Familiarizing yourself with the basic features of your drone, tips as well precautions within the user manual will even make the training process much easier since you will know where to locate certain controls and when they are effective to apply. In the same manner, many drones come with beginner modes and simulators which happen to be very effective for beginners since they allow you to get used to the various controls and this saves you time and keeps yours from making preventable mistakes that would otherwise hinder your learning/training process.
Step 3: How to Use Drone Controls and Aerodynamics
After familiarizing yourself with your drone, the next crucial step is learning how to use the drone’s controls as well as the aerodynamics. For starters, when it comes to the drones, you don’t have to worry about how different drones have varying controls since many drones within the market have a standardized controller layout which consists of buttons and sticks.
Although the appearance of some controllers might differ, the layout is the same. The remote controllers or rather transmitters normally operate a normal gaming controller with buttons and joysticks, so you need not to worry about the whole training process.
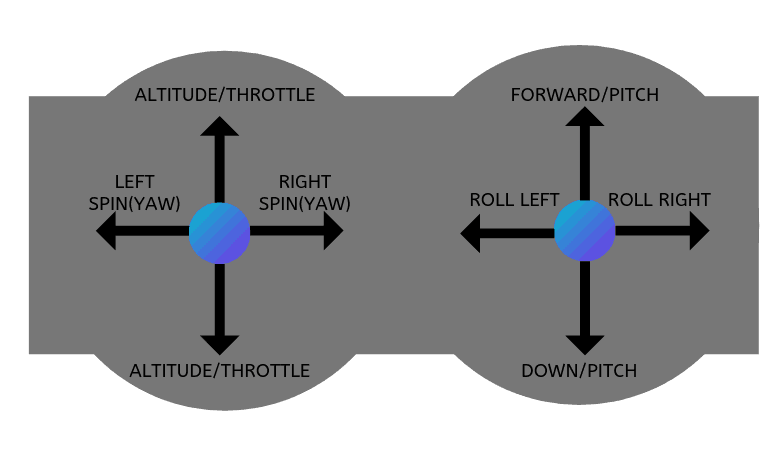
The drone controller has two sticks that are the left and right sticks. The left stick controls two aspects that are rotation (Yaw) and altitude (Throttle). For Yaw (Rudder), when you push the left stick left and right, you cause it to rotate clockwise and anticlockwise. This makes the drone face other directions without living its current position.
For the throttle on the other hand, if you push the left stick up and down, then you will be changing the drone’s altitude accordingly. Its normally used when flying the drone to adjust the height at which the drone is flying. The right stick controls the roll (Aileron) and pitch (elevator). When it comes to pitching you push the right stick up and down then you will be propelling the drone forward and backward accordingly.
If you use roll and you push the right stick left and right, then you will make the drone roll or rather fly along the right and left side accordingly. We also have the right and left trim buttons on the remote controller that help adjust the roll, pitch, yaw and throttle controls if they are off balance.
The drone aerodynamics are also key since they help you to maneuver as well know how to stabilize. For the maneuvering styles, there are two styles, and one is bank turn which is a consistent circular turn which either helps you move in a clockwise or anticlockwise direction, and it’s done by the yaw control.
Hovering is the other style where you can stay in the same position while airborne, and it’s done using the throttle. When it comes to stabilizing, you can either use the GPS hold (loiter) where it returns the drone’s position once the sticks are centered. Attitude (self-level, auto-level) can also be used once the sticks are centered. Lastly, you can use a rate manual (hard/Acro) where it holds the position of the drone so that it can note auto-level itself to its original position.
Step 4: Pre-Flight Checklist and Considerations
Before you get your familiarization into practice you should conduct a pre-flight checklist and consideration to ensure all is well and the following checklist should be considered:
Check the physical condition of the drone and look for signs of breakage, cracks or wear on the propellers.
Check the rules and regulations of the place you plan on flying the drone.
Check to see if your batteries are fully charged as well if they have adequate power to fly the drone.
Ensure that your controller is well and properly connected to the drone.
Check also the weather to ensure that it’s not in a position to hinder the drone for effectively flying.
Check to see if the play you plan on flying the drone is clear for takeoffs and landing.
Ensure that your drones camera settings are well matched.
Check to see if the memory card is well fitted to the drone in case you plan on filming or taking pictures.
Ensure you notify anyone near the drone that you are ready to take off.
And lastly, monitor the drone settings as you fly it.
Step 5: Takeoffs and Landing
This is actually the most important step after the familiarization of the drone, setting in the learning and training process for a beginner.
Before you take off, ensure that there the area you are flying the drone is clear to allow you to fly and control the drone freely. As you take off and land the drone, follow the following safety checklist:
Power up the drone as you also monitor the battery levels as well as the drone settings.
After you are satisfied that all is well, slowly increase the throttle to raise the drone some few inches above the ground.
Hover the drone closer to the takeoff area as you continue to check the settings as well the battery levels.
If you notice an issue with the settings, the battery levels or the drone quickly but slowly land the drone.
As you land the drone announce to anyone near the landing area.
Bring the drone to the landing area as you decrease the speed, slowly and gently then land the drone and ensure the propellers have stopped.
When the drone is safe on the ground, and the motors have stopped, power the drone down and turn off the battery supply.
Step 6: Beginner Drone Flying Techniques
The very first thing you should do at this stage is to check your controls so as to ensure that everything is functional before you start the flight. You shouldn’t attempt to fly unless you are 100% sure that every control is working correctly.
After confirming that all is well, proceed and slowly increase the throttle until the drone is hovering about 2 inches above the ground. Since you are now familiar with the controls, try and slowly move them around to get a feel of how the drone reacts to your inputs.
If you start to feel like you’re losing control of the drone then quickly throttle down to avoid crashing the drone then repeat the same process slowly. After you are confident enough that you have passed the second part, then fly the drone a little higher that is after feeling that you are well acquainted with the controls.
Fly the drone repeatedly, land and fly to the next point for this will help you hover precision as well as improve your landing ability. Next, you have to learn orientation. This can be achieved by starting with the drone at 10 o’clock position then hover at the same position until you are sure enough that you can handle the next position.
After that, you can try other positions for perfection purposes. Next, you can try a nose-in-hovering where you operate the drone as it faces you; at this point, both the aileron and the elevator will be backward. To perfect your nose-in-hover, you can try it at different clock positions.
Lastly, you can try a nose-in-hopping by trying to land at the same position you took off only that this time the nose of the drone is facing in. This step is normally the hardest so take your time and learn.
Step 7: Drone Safety Tips
Always ensure that you have spare batteries with you.
Always have the landing pad with you since it can drastically become the break or make of the scenario.
Get study maps to look for more safer places to fly the drone.
Keep a safe distance and always comply with the FAA drone zone rules and regulation.
Always store the drone in a protective bag.
Don’t try to exceed your drone transmission range.
And replace damaged propellers immediately.
Step 8: Basic Mistakes and How to Fix Them
One of the most common mistakes that beginner drone operators do is not complying with the law, but the one thing that they should do is to fly legally and follow the laws to the latter.
Flying drones near birds is also another mistake, and this can be fixed by avoid doing so at all for the safety of the birds and the drone. Flying drones beyond the operator’s vicinity, flying the drones within the operator’s eyesight is the only solution.
Don’t Fly Near Birds!
Beginners make the mistake of assuming that they don’t need to practice a lot, but in reality, they do for the purpose of becoming even better pilots.
Lastly, beginner drone operators make the mistake of flying the drone in a less open area, and this increases chances of either crashing the drone or even damaging it. Collectively, if you follow the oversteps then you will become a pro in operating drones.
Hopefully, you enjoyed this guide as you perfect your skills in flying your drone!
Related Posts:
- Best Affordable Travel Drones For Beginners (Under $100)
- Best Affordable Travel Drones With Cameras
- How To Travel Safely With A Drone
Are you looking to take your drone addiction to the next step? For users wanting to pass the Part 107 exam, I recommend you check out Drone Pilot Ground School. Did you know that 99% of students pass the exam on the very first attempt? Don’t struggle with trying to figure out all the information and learning alone. Check it out by clicking the banner below!

Recommended Drones For Beginners

Holy Stone HS200

Altair 818 Hornet

DJI Mavic Air Quadcopter